|
MATERIALS NEEDED:
* Card stock.
* Tape.
* Hot Glue.
* 14" Length Of Poly Cord (clothesline).
* Hole Punch.
* Optional: Laminator and Laminating Sheets.
* Welcomebag front and Welcomebag back templates.
Graphics are from CC7: School
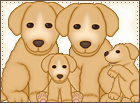
and CC22: Puppies.
INSTRUCTIONS:
Open a landscape sheet in your print program. Import the welcome bag template front. Import your chosen background
and graphics. Add titles or headlines to suit your needs. Print on highest setting.
Repeat this step using a new sheet of cardstock and the welcome bag template back.
Laminate the sheets.
Cut the front and back sides of the bag out.
Score and fold the front and back pieces on the template lines.
Glue or tape the sides together.
Fold and close the bottom. Glue or tape it shut.
Punch holes in the sides of the bag.
Insert the Poly Cord into the holes. Tie a knot on each end from the inside of the box.
It's ready to fill and go!
I used these at my Open House Pre-Enrollment as gifts for next year's students so I didn't add many
embellishments for the three year olds but you can certainly dress these up for any special occasion.
|