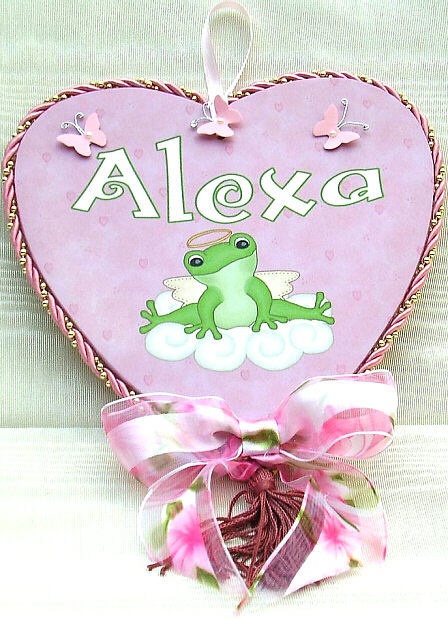
|
MATERIALS NEEDED:
* 1 wooden shape about 6 to 8 inches wide in size, preferrably with a pre-drilled hole in the top.
* Mod Podge.
* Small brush for mod podge.
* Clear acrylic spray.
* Low Temp Mini-Hot Glue.
* Optional: Tassle, wire ribbon, fabric cording, scrapbook paper embellishments etc.
Clipart is from CC2: Frogs and background from
CC19: Love/Valentine.
INSTRUCTIONS:
Open a landscape sheet in your print program. Select a background and fill the sheet with it.
Decorate with graphics as you wish. Print out on your printer's highest setting. Lightly spray the
printed sheet with acrylic spray. Let it dry 15 to 20 minutes.
Holding your wooden plaque against a window, lay your decorated sheet over it. Using the sun
behind the plaque to guide you, center your design to fit the way you want in on the board. Lightly
press the paper against the edges of the wooden plaque to give you a crease all the way around.
Now you are ready to cut your paper. Using the crease as a guide line, leave approximately a 1/2
inch of paper from the crease outward as a selvage edge to work with. You will be using this to
cover the sides of the plaque. (You may have to leave more of a selvage edge if you are using a
thicker wooden plaque).
Apply a thin layer of Mod Podge on the front of your plaque. Apply your paper and smooth out the
air bubbles as you go. A rolling pin works great for smoothing out your paper!
You now have that selvage edge to work with. Using small sharp scissors, snip from the outside
edge of your paper up against the edge of the plaque. Go all the way around the edges making
cuts approximately 1/4 inch wide. Your paper will look fringed when you are done. Apply Mod
Podge to the back of the fringed paper. Fold the fringed paper down to cover the edges of your
plaque. Smooth out any bubbles and work your way around all the edges. Trim away any excess
selvage paper from the back edge of the plaque. Let dry for approximately 30 minutes.
Lightly spray the plaque with acrylic spray. 2 to 3 light coats should give you a nice finish.
Now you can embellish as you wish!
|


