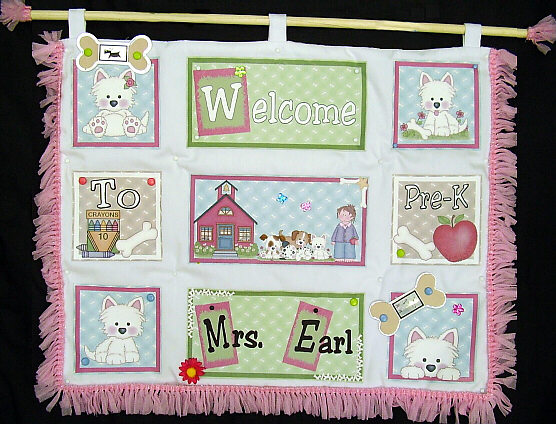
|
MATERIALS NEEDED:
* 3 Sheets of Dark T-Shirt Ink Jet Transfers.
* 1/2 yard white or cream colored cotton material, washed, ironed and cut in 1/2 to
make 2 pieces.
* Ruler and Pencil.
* Low Loft Cotton Batting, cut to fit your front and back material pieces.
* Sewing Machine.
* Wooden Dowl Rod.
* Quilt Binding.
* Iron.
* Optional: brads, metal tags, fancy gimp etc.
* Banner rectangle and
Banner square templates.
Graphics are from CC22: Puppies,
CC7: School and
CC11: School bears.
INSTRUCTIONS:
Open a landscape sheet in your print program. Import the square template and the rectangle
template. Adjust to get your desired size for your finished project. For my banner I had 4 squares
on my first transfer sheet, another transfer sheet had 2 rectangles on it and the last transfer sheet
had 1 rectangle and 2 squares on it.
Fill each rectangle and square template with coordinating graphics. Follow the transfer's
manufacturer's instructions to get the best results. I used the Avery brand. Cut out each square
and rectangle.
Using one piece of your material, start at the top left and work your way across the top design line.
Use the ruler and pencil to make small marks where your next piece will go. I left an inch between
each section. Iron each piece on, one at a time. Continue to the next row until you are done.
Cut 3 three inch strips from the quilt binding. Fold them in half. These will be your loops to hang
the banner from.
Time to sew!
Place your decorated material piece on the table, face up. Postion and pin your 3 hanging loops
with the bottom ends matching your decorated piece edge. The loop's tops will be facing toward
the inside of your layers. Lay your bottom piece of material on top of the decorated piece with
right sides facing. Lay your cotton batting on top of the back piece. Pin all the layers together.
Sew around all edges leaving a 4" opening on one side. Trim the corners at a diagonal. Remove pins
and turn the banner inside out. Iron edges to smooth out and hand stitch the opening closed.
Now you are ready to embellish! You can hand quilt but I liked using the metal brads! Just push them
through all the layers to give a scrapbook effect.
If you don't sew, just hot glue all the edges together or iron together using hem tape. Leave
about a 2 inch edge all the way around. Cut 1/2 inch slits in the edge to create a fringed effect!
|


